
CHICAGO · PHOTO SPOTS
The Best Instagram Spots in Chicago
Eight places to photograph the city — with real Instagram inspiration, portrait ideas, the best light and maps.
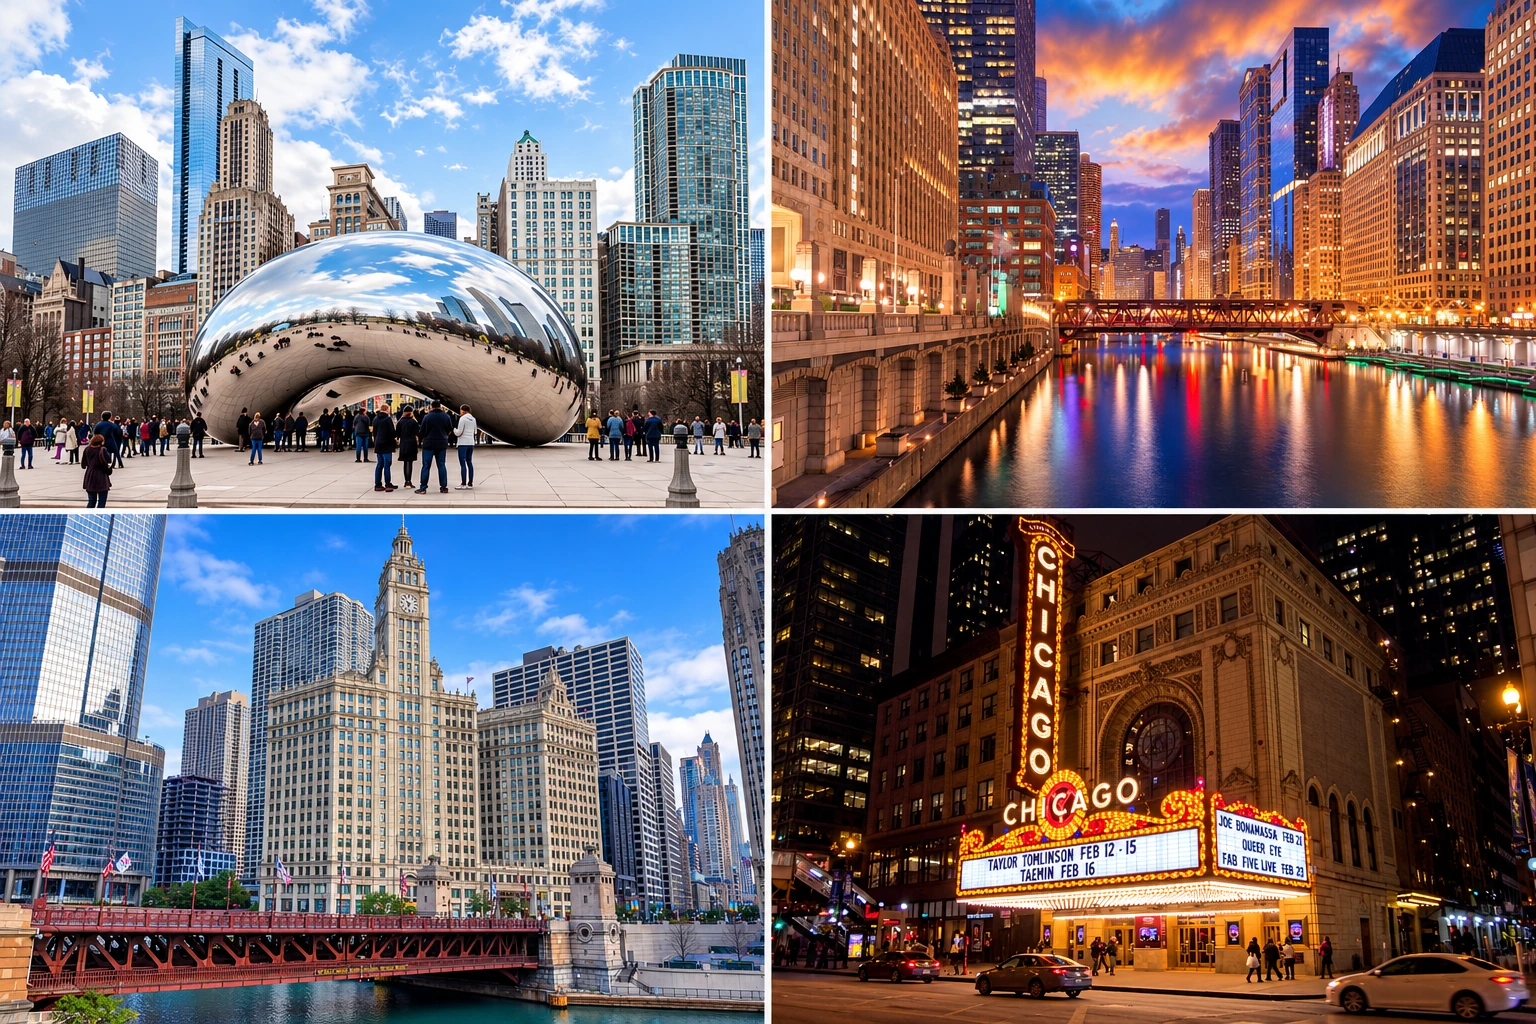
A photograph worth bringing home begins with a place, a little patience and a clear idea of the picture you want. Chicago gives you mirrored steel, a stained-glass dome, riverfront towers and long stretches of lakefront. This guide pairs eight of those settings with public Instagram posts that show different ways to compose the scene.
Use the examples to plan your framing and pose, then adapt them to the light and access you find. The time recommendations below are starting points, not claims about when the example photographs were taken. For sightseeing beyond the camera, see our Chicago TOP23 attractions guide.
Plan your photo walk
Start with Cloud Gate and the Cultural Center, continue to the theatre and river, then choose one lakefront area for the evening. Museum Campus and Lincoln Park are separate outings; allow time to travel between them. Seven of these viewpoints have free ordinary outdoor or building access; 360 CHICAGO requires a ticket. Formal photo sessions can require permits even where admission is free.
Cloud Gate · Preston Bradley Hall · DuSable Bridge · Chicago Theatre · Waterfront beside Adler · Peoples Gas Education Pavilion · North Avenue Beach · 360 CHICAGO
1. Cloud Gate
Reflections & public art · Millennium Park · Chicago, Illinois, USA
Cloud Gate works twice: as a sculpture in its own right and as a curved mirror of the city. A wide view gives the steel shape room to breathe, while a closer portrait makes the reflection part of the background. Look at the edge of the sculpture before pressing the shutter: a clean outline matters more than filling every corner of the photograph.
Best time of day
Early morning, soon after the park opens, for a quieter plaza and gentler light.
What to notice: A clear architectural composition: plaza lines lead toward the sculpture and skyline.
What to notice: A walking portrait with the mirrored skyline filling the background.
Try this portrait: Walk past the reflection
Stand a few steps in front of the sculpture, slightly off-center, with your body turned about a quarter turn. Take one slow step and look toward the brighter side of the sky. Keep a gap between your head and the sculpture’s edge.
Where to put the camera: Start with the phone’s main 1× camera, step back and keep the person near the center to avoid stretching their proportions. Try a lower camera position for a full-length picture, but keep it level enough that the buildings do not lean excessively.
Another frame: Step back to keep the whole sculpture and reflected skyline in the frame. For a second composition, move beneath the arch and make the distorted reflections the subject.
FREE VIEW / ADMISSION
Free park visit. Work around other visitors and follow the park’s entry rules.
2. Preston Bradley Hall
Dome & symmetry · Chicago Cultural Center · Chicago, Illinois, USA
Preston Bradley Hall rewards a deliberate, vertical composition. The Tiffany dome, hanging light and marble arches can be arranged along one central axis. A person kept small near the bottom of the frame makes the scale easier to read; this is an architectural portrait rather than a close-up of a face.
Best time of day
Late morning to early afternoon, within public opening hours, for daylight through the dome.
What to notice: A small, centered figure gives the Tiffany dome a sense of scale.
Try this portrait: Let the room dwarf the person
After checking the photography policy, place the person on the hall’s centerline, well away from doors and other visitors. A still pose, a relaxed stance and an upward glance suit the symmetry better than a large gesture.
Where to put the camera: Step back and compose vertically so the dome and arches remain the main subject. A wider lens may help, but keep the person away from the edges. For a closer face portrait, move to softer window light rather than pointing the camera almost straight up.
Another frame: Stand near the center of the hall and point upward to balance the Tiffany dome’s circular geometry. Include the surrounding arches for a composition that explains the room.
FREE VIEW / ADMISSION
Ordinary admission is free. Formal posed photography, including professional family sessions and similar events, requires a photography permit. Check the Cultural Center photography policy before planning a session.
3. DuSable Bridge
River & architecture · Chicago River & North Michigan Avenue · Chicago, Illinois, USA
DuSable Bridge connects several different Chicago pictures within a short walk. From the south end, the Wrigley Building is a natural backdrop; from the nearby south-bank Riverwalk, the bridge itself becomes a strong foreground line. The example below uses the riverside angle, so treat the map as a starting point and compare the public viewpoints before choosing your frame.
Best time of day
Late afternoon into blue hour, when daylight on the stonework gives way to city lights.
What to notice: The bridge, pale Wrigley Building and water form a layered river scene.
Try this portrait: Turn toward the river
On a spacious section of the public sidewalk, turn the body toward the water and look back over one shoulder. Place the person to one side of the Wrigley clock tower so their head does not cover it. Keep the pose brief and leave the walking route clear.
Where to put the camera: Photograph from the same sidewalk, never from the road. Start at waist-to-chest height, with the railings leading into the scene. Take a second frame with a little more river and less sky to compare the balance.
Another frame: From the public sidewalk at the south end, look north toward the Wrigley Building. Use bridge railings or a bridgehouse as foreground detail, with the clock tower beyond.
FREE VIEW / ADMISSION
Free public sidewalk. Leave space for people crossing the bridge.
4. Chicago Theatre
Marquee & street scene · State Street · The Loop · Chicago, Illinois, USA
The Chicago Theatre’s vertical sign makes an instantly recognizable street portrait. Its tall shape favors a vertical frame, with a little street and facade left around it. Blue hour is especially useful because the sky still carries color while the sign and marquee provide warm highlights.
Best time of day
Blue hour and after dark, when the marquee and vertical sign are illuminated.
What to notice: Warm marquee lights stand out against the blue evening sky.
Try this portrait: Pause beneath the sign
From a safe position on the opposite sidewalk, place the person below and to one side of the vertical sign. Turn the shoulders slightly and look toward the theatre, or take one small step along the sidewalk. Keep the entire sign visible above the head.
Where to put the camera: Use the main camera rather than a very wide close-up. Expose to retain the lettering, then check that the face is still visible. Take a few steady frames during blue hour; after dark, a deliberate silhouette may work better than forcing a bright face.
Another frame: Use the opposite public sidewalk to fit the vertical CHICAGO sign into a street scene. Try a tighter frame of the marquee as a second image, rather than repeating the same full facade.
FREE VIEW / ADMISSION
The exterior view is free. Interior tours and performances need a ticket; frame from the sidewalk, not the roadway.
5. Waterfront beside Adler
Wide skyline · Museum Campus · Chicago, Illinois, USA
The public waterfront beside Adler Planetarium puts open water between you and downtown. That separation is what makes the skyline readable: the buildings become a single clear shape rather than a crowded street backdrop. The example shows a daylight portrait; the same public shoreline also works for evening silhouettes and city lights.
Best time of day
About an hour before sunset through blue hour: first for silhouettes and sky color, then for city lights.
What to notice: A seated figure facing the skyline shows how much space to leave around the subject.
Try this portrait: Give the skyline some breathing room
On a broad, dry section of the public path, face the skyline with your back or shoulder toward the camera. Keep the figure low in the frame and turn the head slightly toward one side. For a couple, stand close together without covering the tallest buildings.
Where to put the camera: Use a level horizon and leave water between the person and the skyline. A normal or modest telephoto view can make the buildings appear larger, but step back on the path rather than toward the water. The seated example is a composition reference, not a reason to use a wet or exposed edge.
Another frame: From the public waterfront path on the northwest side of the planetarium, look back across the water toward the Loop. Leave some lake in the foreground so the towers have room to breathe.
FREE VIEW / ADMISSION
The outdoor viewpoint is free. Entering the planetarium is a separate paid visit.
6. Peoples Gas Education Pavilion
Structure & nature · Nature Boardwalk · Lincoln Park · Chicago, Illinois, USA
The Peoples Gas Education Pavilion, often called the Honeycomb, turns a simple portrait into a study of repeating curves. From the center, its timber lattice forms a tunnel; from one side, the structure sweeps diagonally across the image. The wedding photograph below is a useful composition reference even if your own picture is a casual travel portrait.
Best time of day
Early morning or late afternoon, when lower-angle light can give the lattice more depth.
What to notice: A professional wedding portrait uses the pavilion’s repeated arches as a frame.
What to notice: A closer architectural view makes the lattice, rather than the people, the subject.
Try this portrait: Stand inside the repeating arches
For a solo portrait, stand on the central axis with one foot slightly forward and hands relaxed. For a couple, face each other or walk slowly together; you do not need wedding clothes or a dramatic lift. Keep the feet and the arch opening visible.
Where to put the camera: Center the camera on the pavilion’s axis and compare left and right edges. Photograph from around waist height, stepping back until several ribs are included. Move the subject within the softer light if a strip of sun falls across their face.
Another frame: Use the pavilion’s curved lattice to frame the distant skyline. Then move to the nearby public bridge for a wider scene combining pond, planting and downtown towers.
FREE VIEW / ADMISSION
Free Nature Boardwalk access. Stay on the public paths and allow room for scheduled activities. For a planned portrait or wedding session, check the zoo’s visitor information and obtain any required permission before arranging equipment or a group.
7. North Avenue Beach
Shoreline & skyline · Lincoln Park lakefront · Chicago, Illinois, USA
North Avenue Beach offers both a broad lakefront scene and the familiar view south toward the skyline. The curved waterfront can guide the eye toward a person or couple, while the distant towers give the photograph its setting. The selected portrait was photographed by travel creator Natalia Hasenkampf, @travelwithtalia, and shared by @renatainchi with that credit.
Best time of day
Early morning for light on the skyline; blue hour for a view with city lights.
What to notice: A couple walking hand in hand toward the skyline. Photography credited in the original post to @travelwithtalia.
Try this portrait: Walk hand in hand
For the walking composition, begin a few paces apart from the camera, hold hands and walk slowly away. Turn your faces slightly toward one another so the photograph reads as a shared moment. For a solo version, take a slow step and look back over one shoulder.
Where to put the camera: Use a dry, permitted part of the promenade or beach with space to move. Frame the skyline above the shoulders and leave room below the feet. Take a short burst while the person moves; do not reproduce a wet-edge position simply because it appears in an older photograph.
Another frame: Look south along the curve of the beach and use the shoreline as a leading line toward the towers. Make the boat-shaped beach house a separate subject for variety.
FREE VIEW / ADMISSION
Public outdoor access is free. Use pedestrian routes and respect beach and swimming rules.
8. 360 CHICAGO
Elevated lakefront · 875 N. Michigan Avenue · Chicago, Illinois, USA
At 360 CHICAGO, the windows make the city part of an indoor portrait. Choose a clear pane and a view that leaves recognizable buildings or shoreline around the person. The north-facing lakefront is a different option from the inland window portrait shown below; compare both before settling on a composition.
Best time of day
Late afternoon through blue hour, provided visibility is suitable; allow time to photograph both daylight and the illuminated city.
What to notice: The official observation-deck account shares a window portrait, credited to @cheryleneshangpliang.
Try this portrait: Use the window as a frame
Stand near a clear window with the body at a slight angle, shoulders relaxed and one foot in front of the other. Turn the face toward available side light. Keep window dividers from running through the face and leave the view visible beside the person.
Where to put the camera: Turn off flash and avoid photographing straight into a bright reflection of the room. A 1× phone view is a good starting point. Move yourself a little to change reflections; do not lean equipment or body weight against the glass or safety barriers.
Another frame: Look north along the shoreline for a different composition from the familiar downtown panorama. Try a vertical frame to emphasize the meeting of towers, beach and lake.
TICKETS & ENTRY
Paid observation-deck admission. TILT is an optional extra and is not needed for this view. Official tickets and visitor information · GetYourGuide tickets.
Make the picture your own
For a solo portrait, start with the body slightly turned, put your weight on the back leg and give the hands something natural to do: hold a jacket, touch a hat or take a slow step. Ask the photographer for several frames between poses. A relaxed turn or glance often looks more convincing than holding one rigid position.
Keep the attraction recognizable. Start with the main 1× phone camera and step back before switching to an ultra-wide view; faces and limbs stretch near the edges of a very wide frame. Avoid strong artificial background blur when the dome, sign or skyline is the reason for the photograph. Tap to focus on the person and check both their face and the brightest part of the background before moving on.
Light before filters
For a face portrait, look for open shade or gentle side light. With the sun behind the subject, check the face rather than assuming the camera will expose it correctly. At blue hour, ask the person to pause and take several steady frames. Keep natural skin tones when editing; a deeply saturated sky is less useful if the face becomes orange.
Access, permits and the original posts
Stay on public paths and permitted visitor areas, leave walking routes clear and choose dry, stable ground. The availability of a viewpoint does not give a group exclusive use of it. Planned engagement, wedding, commercial and other formal sessions may require permission; review the Chicago Park District photography information and the rules of the specific venue.
Instagram examples remain with their original accounts and retain their attribution. A creator can remove a post or change its visibility. If an example does not load, use its direct Instagram link. These are editorial choices for composition and variety, rather than a ranking of Instagram popularity.
Sources & further planning
Chicago Cultural Center: access and photography · Chicago Park District: photo permits · 360 CHICAGO: planning your visit · Nikon: focal length and environmental portraits · Nikon: portrait technique. The original Instagram posts are linked beside their examples.
GetYourGuide links include our partner ID. We may earn a commission from bookings made through these links.